Models4Insight Platform User Guide
About Models4Insight
Models4Insight is a Software as a Service solution, that helps you to manage the lifecycle of your ArchiMate models. It consists of 4 parts:
- Model Repository
- Platform
- Analytics Library
- Data2Model
- Consistency Metrics
By storing your models in the Models4Insight Model Repository, you create a single source of truth which can be used for analysis. The repository is accessible via the Models4Insight Platform, which also provides model management features, such as:
- Collaboration
- Versioning
- Conflict management
- Branching
Data2Model helps you to automatically generate ArchiMate models from structured datasets like Excel spreadsheets, CSV, or JSON. This includes deriving concepts from your data, as well as arranging them into meaningful views. Data2Model integrates well with the Models4Insight repository and platform.
The analytics library provides a basis for automated model generation, as well as advanced analytics using models. It is available as a Python distribution upon request.
This user guide is intended as a reference to help you get set up with the Models4Insight platform.
Registration
Before getting started, please register an account. To register, please visit www.models4insight.com and click the register button.
Clicking the register button takes you to the user registration page where you are asked to provide some personal information. Note: A username cannot use capital letters, special characters or double spaces.
Once you have filled in all the information, click on register. You will receive a verification email at the address you provided. You need to verify your registration before you can log in.
You should immediately receive an email from Aurelius Enterprise. The link within is valid for 5 minutes. Check your spam folder if you cannot find the email. If 5 minutes have passed, please click the re-send email button.
Login
All Models4Insight services use a single sign-on. This means you only need to log in once to use either. To log in, press the login button at the top of the Models4Insight homepage. You will also be prompted to log in when visiting the platform directly, if you have not already done so.
Once logged in, you will be directed to the Models4Insight platform.
Accessing the Models4Insight Platform
You can access the platform by clicking on the platform button on the Models4Insight homepage. Alternatively, you can navigate directly to the platform.
On some mobile devices, it is possible to save the platform to your home screen. You will be prompted to do so after you first log in. Using the platform as an app provides a more seamless user experience and helps you get back to the platform more easily.
The platform is where you upload models, do version control, and control the authorization of project members. You can upload different versions, retrieve the versions that you previously uploaded, clone branches to work simultaneously on different versions of the same model and merge them back together.
Home
Welcome
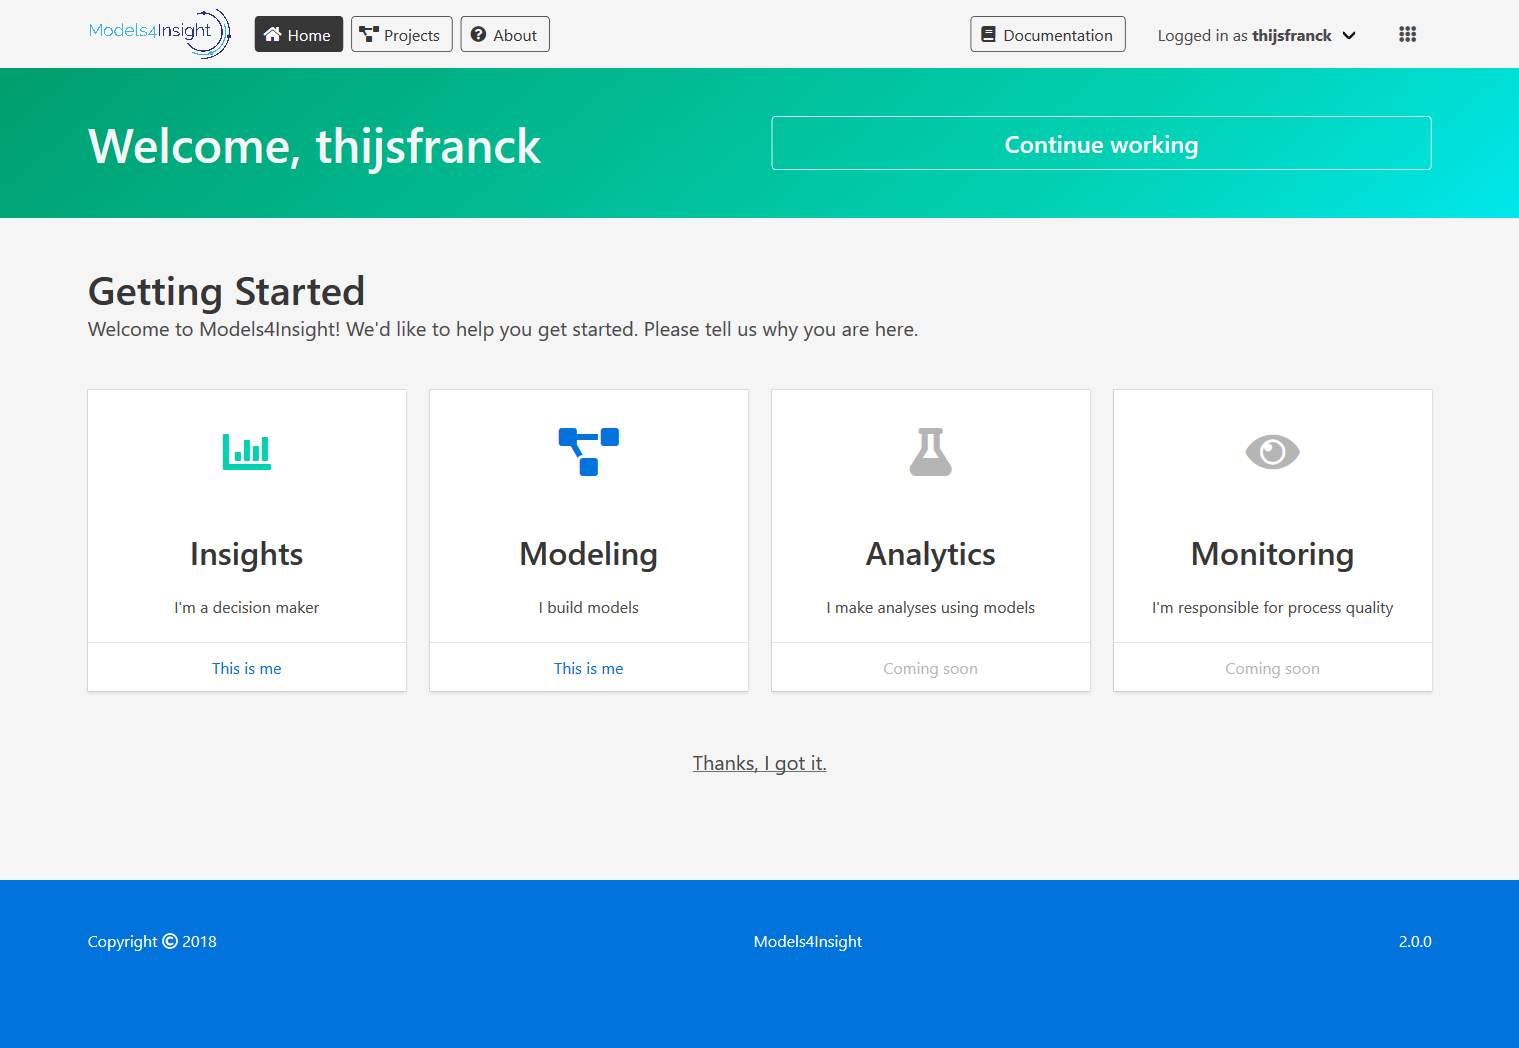
On first visiting the Models4Insight platform, you will be presented with an introductory page that is intended to help you get started quickly. Depending on your preferred role, please select the option that fits best. You will then be presented with a set of recommended actions. If you do not like the role you have selected, you can go back and choose another.
Returning user
If you are a returning user, you will instead be presented with a quick access menu. The continue working button will take you back to the page that you last visited when using the platform. There is also a list of your favourite projects, as well as your most recently visited projects. You can directly open a project by clicking the corresponding table row.
Projects Overview
The projects page gives an overview of all the projects you have access to. This includes private projects of which you are a member, as well as all public projects. Here you also have the option to create a new project.
Create project
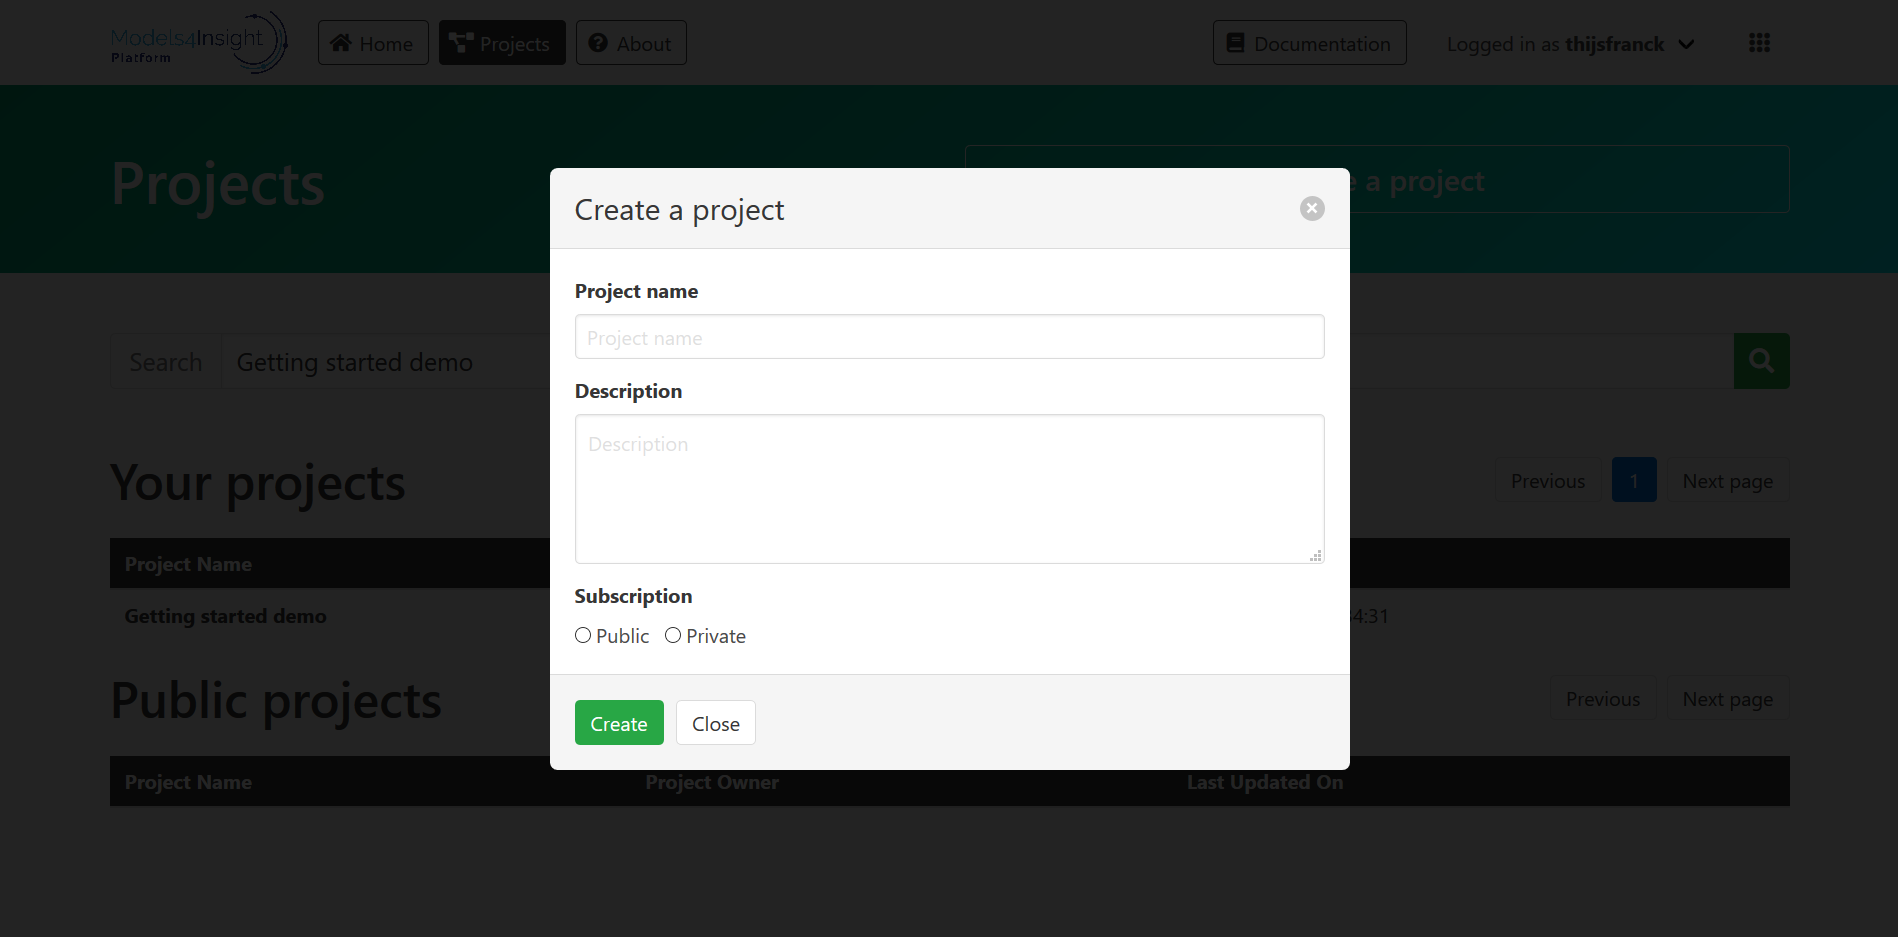
To create a project, fill in a project name and description. You cannot use the same project name twice. Furthermore, it must contain at least three characters, and cannot contain special characters or double spaces. Next, please provide some description of your project. The description cannot be empty. Under subscription, you have an option to make this project public or private. When you decide to make a project public, anyone who has access to the platform can see it, access it and download your models. Creating a private project limits access to you and those you have authorized (how to add new members to your project is explained under the Add member section). Please select your preference and click the create button.
Opening an existing project
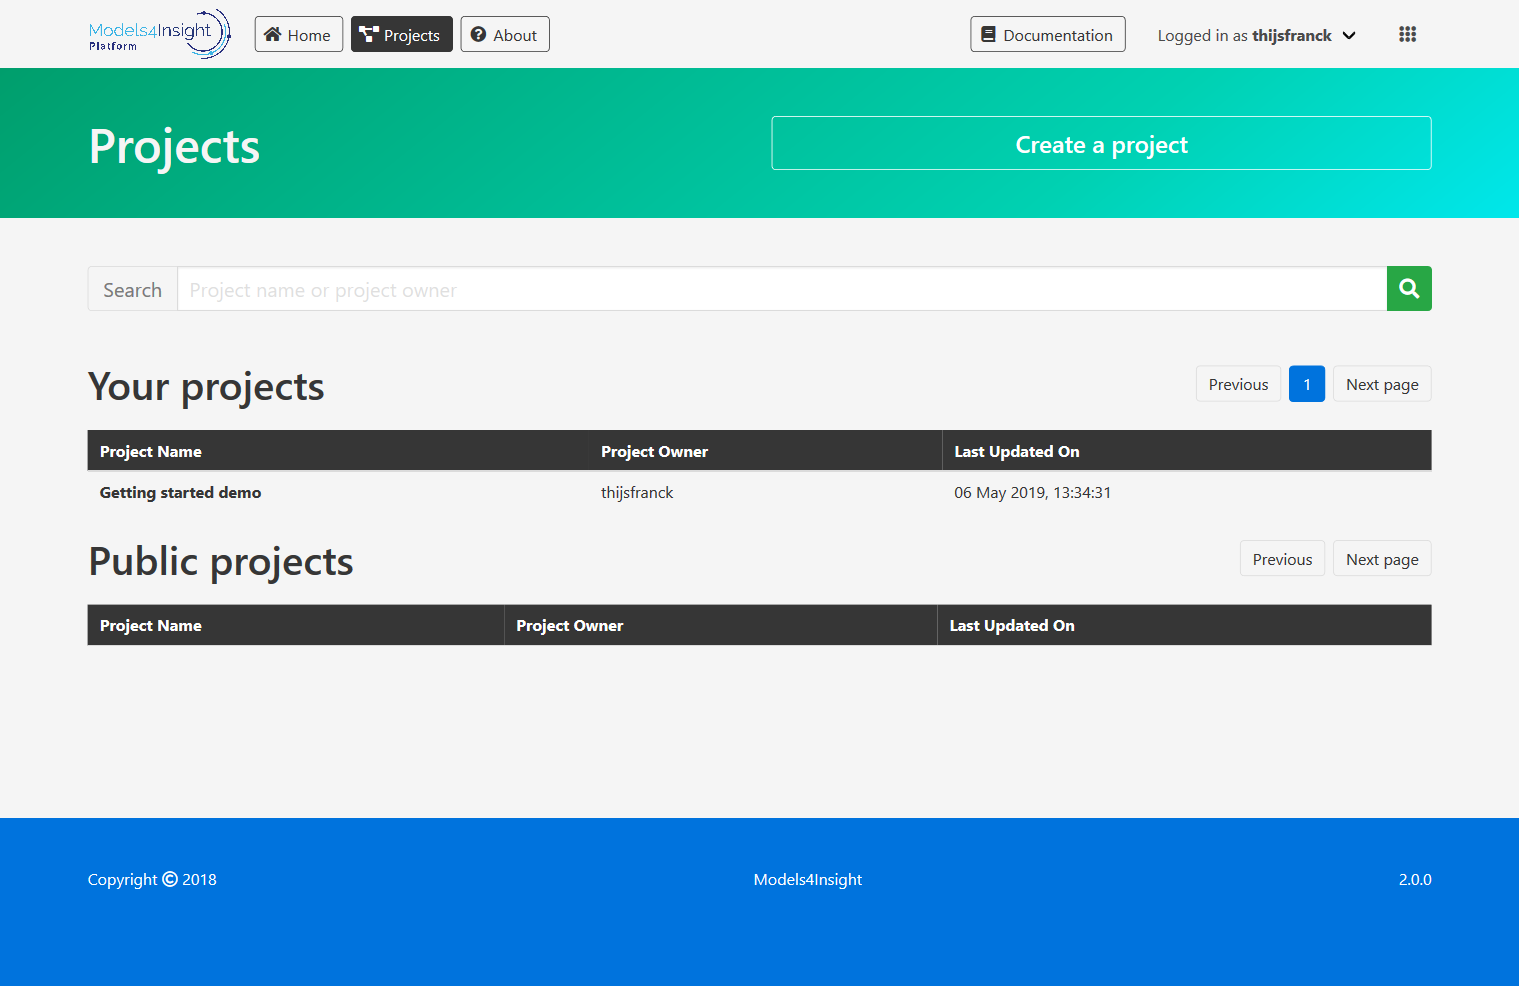
In addition to creating projects, you can also open your previously created projects or any projects shared with you. The table on the right of the page lists all projects of which you are a member. You can open any project by clicking its name in the table. You can search for any specific project using the search bar on top of the table. In addition, you can sort each column of the table by clicking the respective column headers.
Project Homepage
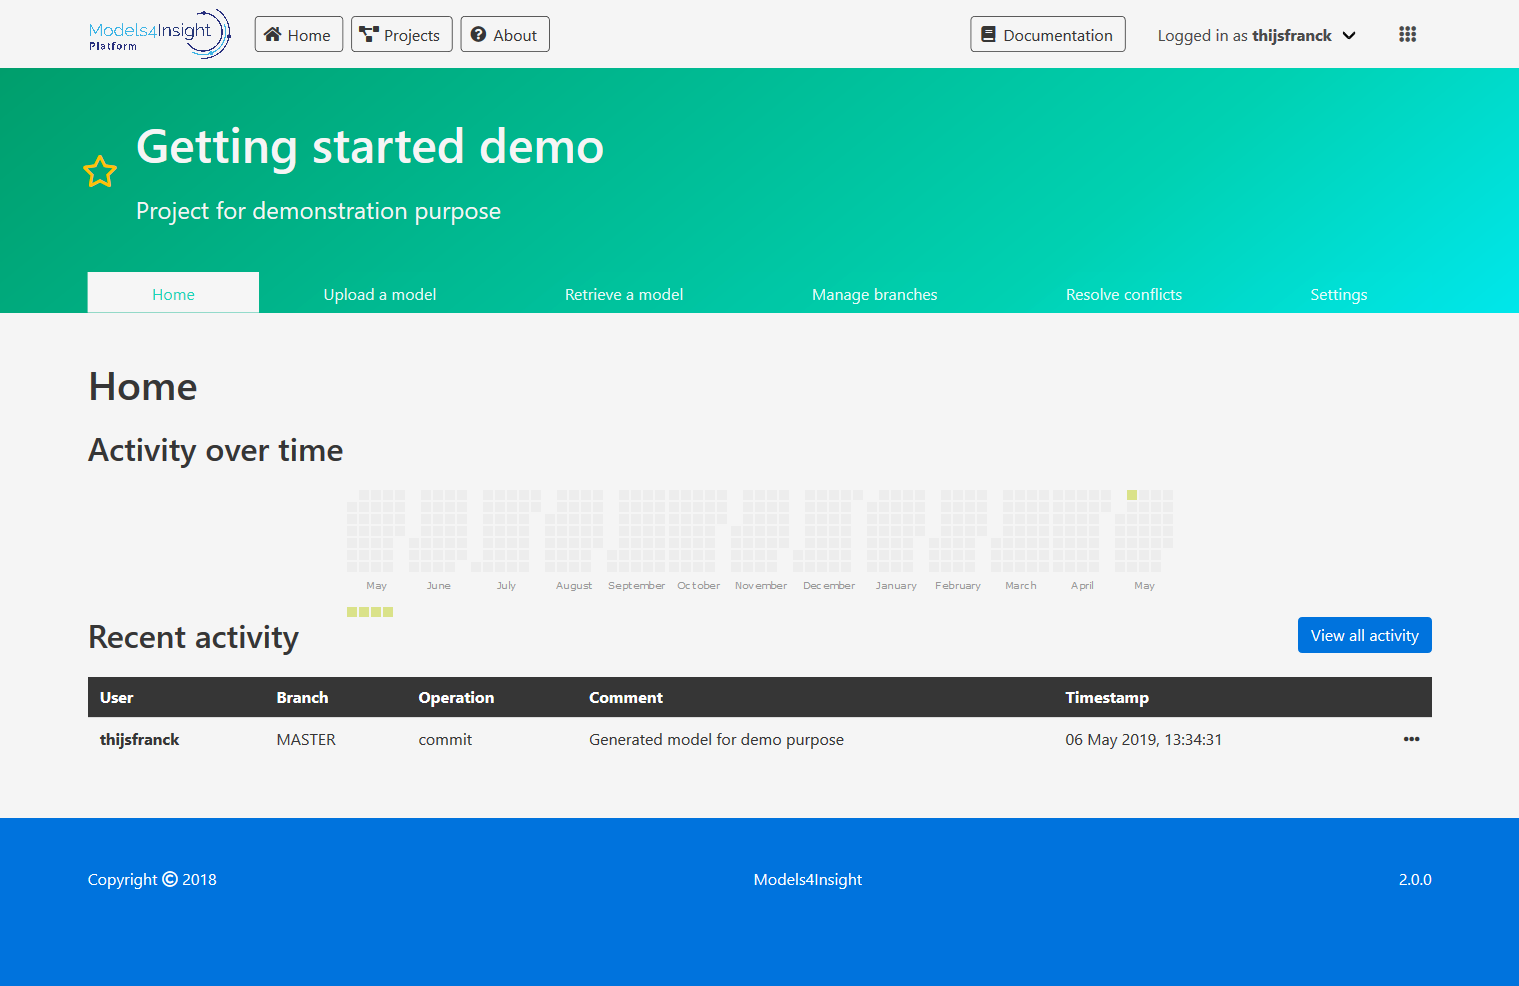
Opening a project redirects you to that project’s homepage. On your first visit, you will be presented with a short introduction. This introduction will guide you in setting up your project.
On returning visits, you will instead be presented with an overview of the recent activity in the project.
Project welcome
Whenever you open a project without any models in it, you will be presented with a short introduction that is intended to help you get set up.
Project actions
There are various actions you can perform related to version control, tracking your team’s activities, access control and publishing your model(s) to the portal. Each of these actions is described in the sections below. Some of these actions (e.g. publishing a model and adding new project members) are only available to users with elevated permissions.
Upload a model
Available to: Model contributor and higher
To add new models to your project, or to update existing models, you can upload ArchiMate model files from your computer to the Models4Insight repository. The repository currently supports ArchiMate models created in the open-source tool Archi (www.archimatetool.com). You can recognize Archi model files by the .archimate extension.
When you upload a model, you will update the branch you have selected with a new version.
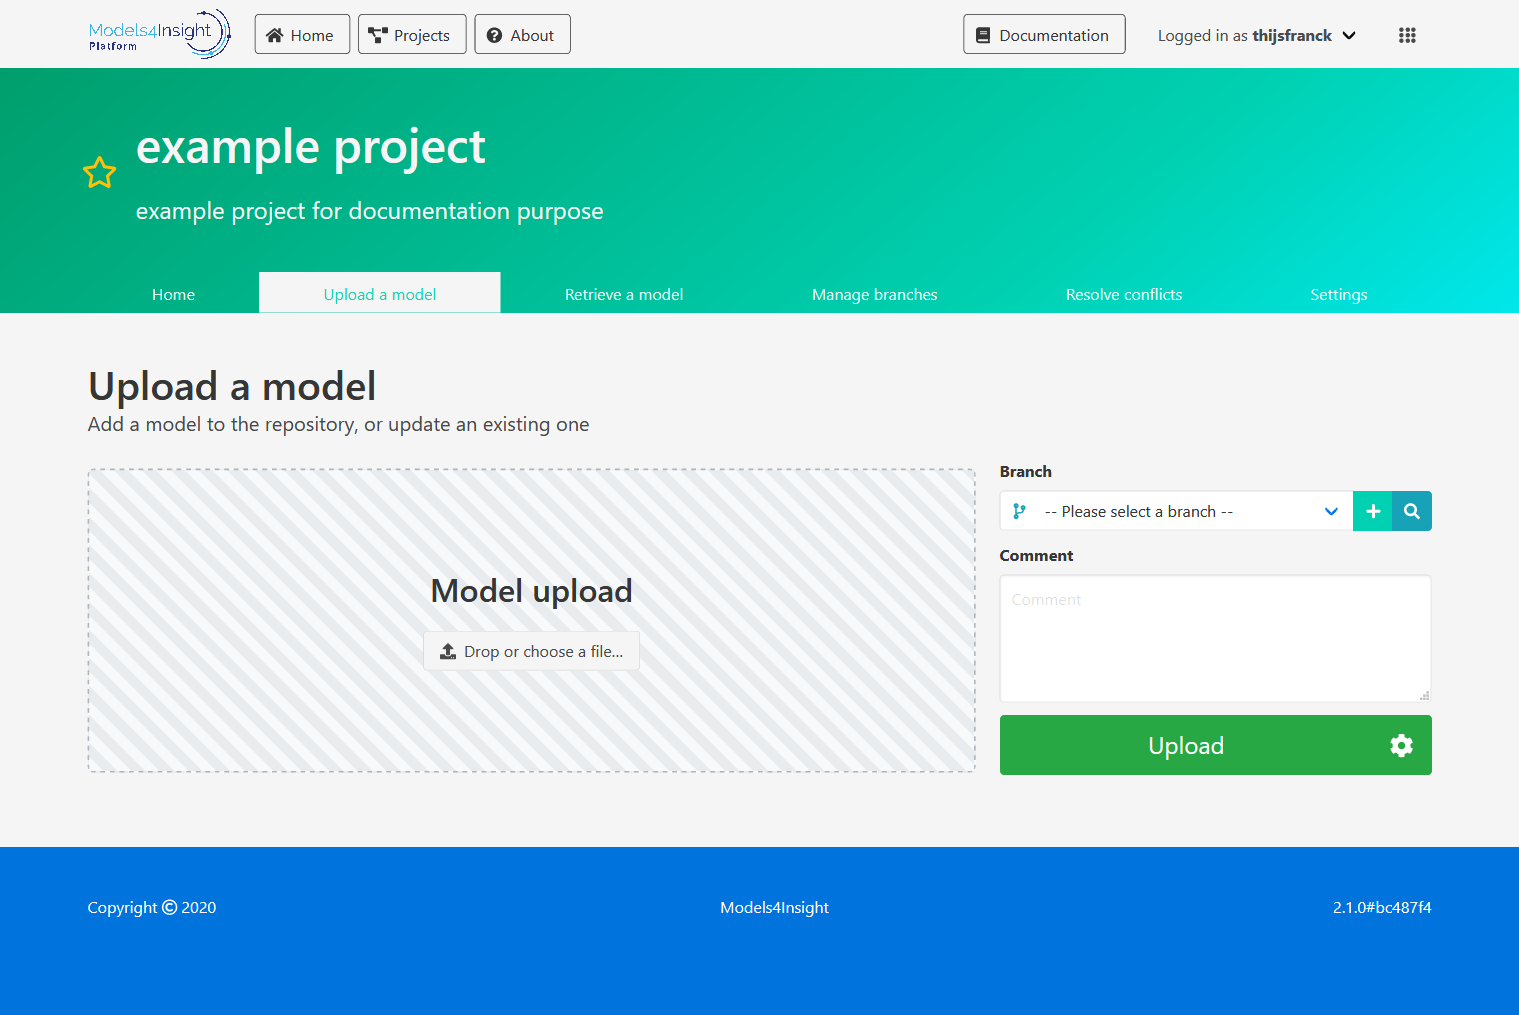
To select a file to upload, drag a file into the striped upload area, or click the button inside of the area to open a ‘select file’ dialog window. After selecting a file, please select your target branch. If you want to publish your model to a new branch, please click the Plus button next to the branch field and enter the name of your new branch. Please also provide a short description in the Comment section (this cannot be empty!). Finally, please click the Upload file button.
A progress bar will appear at the top of the window to indicate the progress of the upload. After the upload completes, your model will be available from the model repository.
When the repository recognizes that your upload contains changes to the model, you will be prompted to choose which changes to keep. You can read more about how this works in the Conflict Resolution section.
In some specific cases, you may want to set additional parameters for your model upload. The settings button next to the upload button opens an options window that allows you to do the following:
| Option | Description |
|---|---|
| Conflict resolution template | By selecting a conflict resolution template here, the selected template will be automatically applied when conflicts are detected. This skips the manual conflict resolution step. |
| Keep original ids | By default, concepts are assigned an id when they are first imported into the repository. The repository uses these ids to detect whether two concepts are the same. When importing a model from another project, the concepts in that model will already have tracking ids assigned to them. When this option is enabled, the repository will use these ids rather than newly generated ones. This ensures that changes made to the model (in either project) can be shared between projects without causing model inconsistencies. |
Retrieve model
Available to: Business user and higher
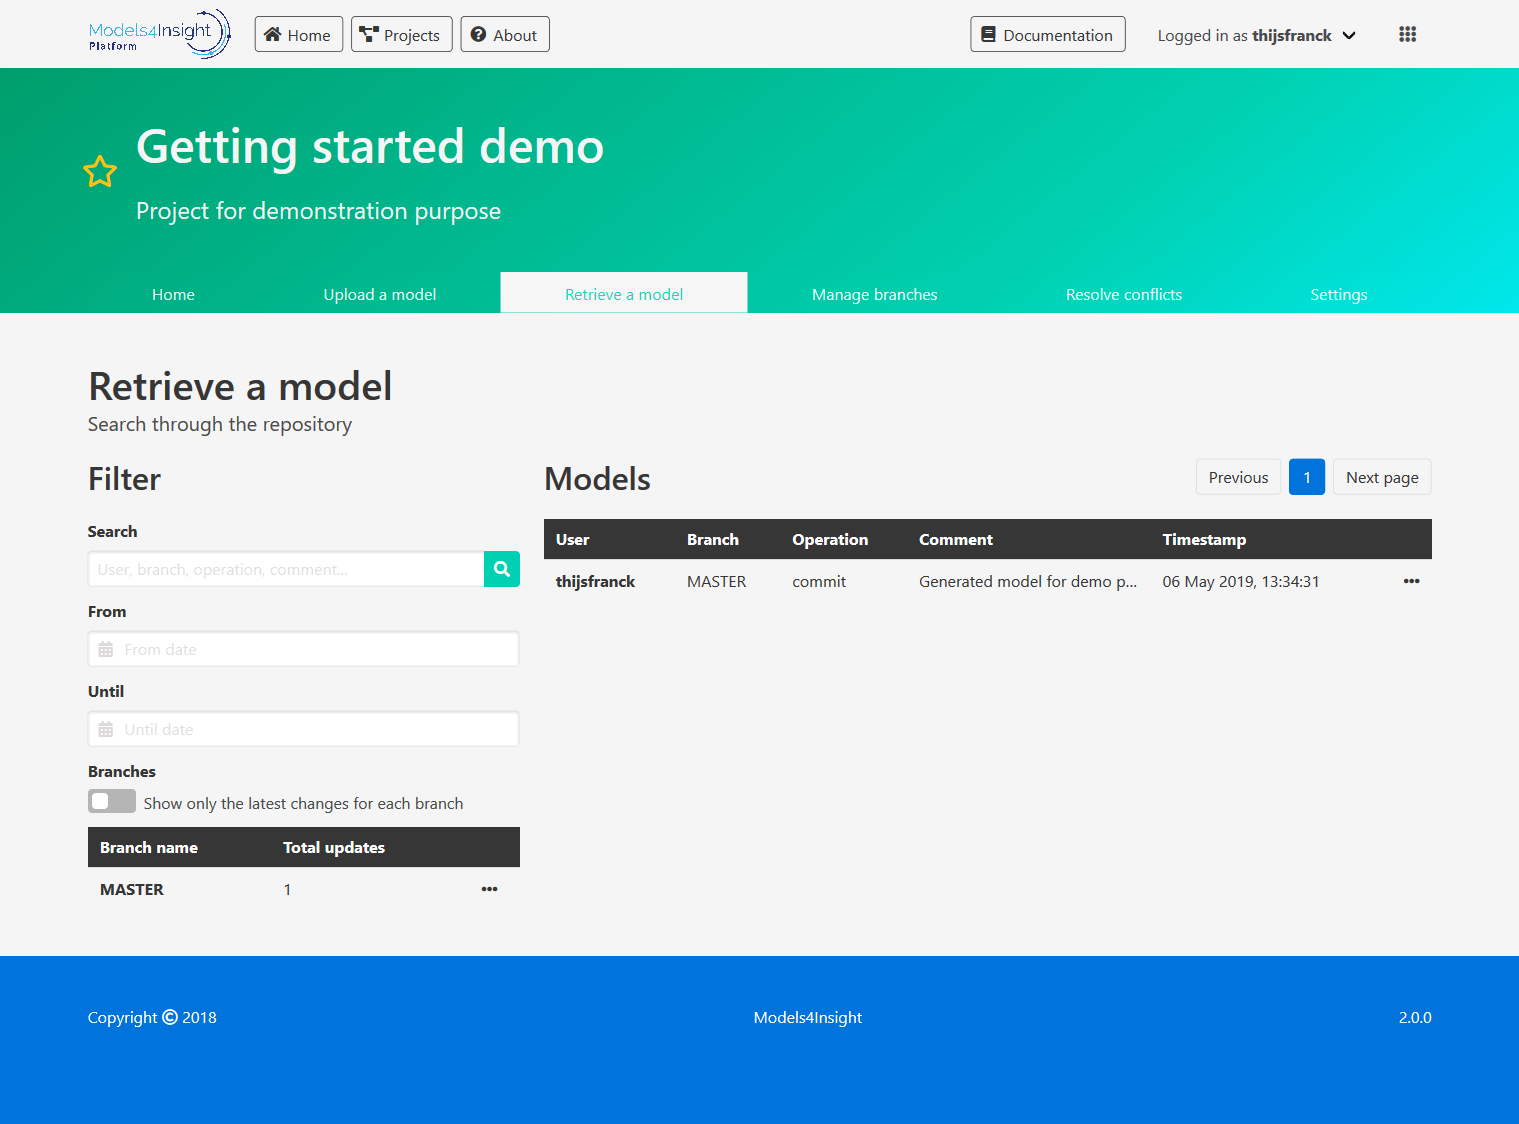
To retrieve a model from your project, click on Retrieve a Model in the menu under the project banner. Here you will find an overview of all versions of the model currently in the repository. The overview is on the right side of the page. On the left side of the page, you will find a number of filter options that will help you find the version of the model you’re looking for. You can filter based on the branch containing the model, the time period in which it was committed, as well as the description of the model and the person who committed it. Once you have found the version of the model you’re looking for, you can download it by hovering over the corresponding context menu with your cursor (represented by three dots) and clicking ‘Retrieve model.
If you are looking for the latest version of a model for a particular branch, you can also click ‘Retrieve latest’ under the context menu for that branch.
You can use Archi to open the retrieved models. The name of the file you retrieve is automatically generated. Do not be confused if this is different from the original name of the file you uploaded; the content of the model is still the same.
Model explorer
If you would instead like to view the model in your browser, click the ‘Explore Model’ under the context menu for the version you would like to view.
Model view
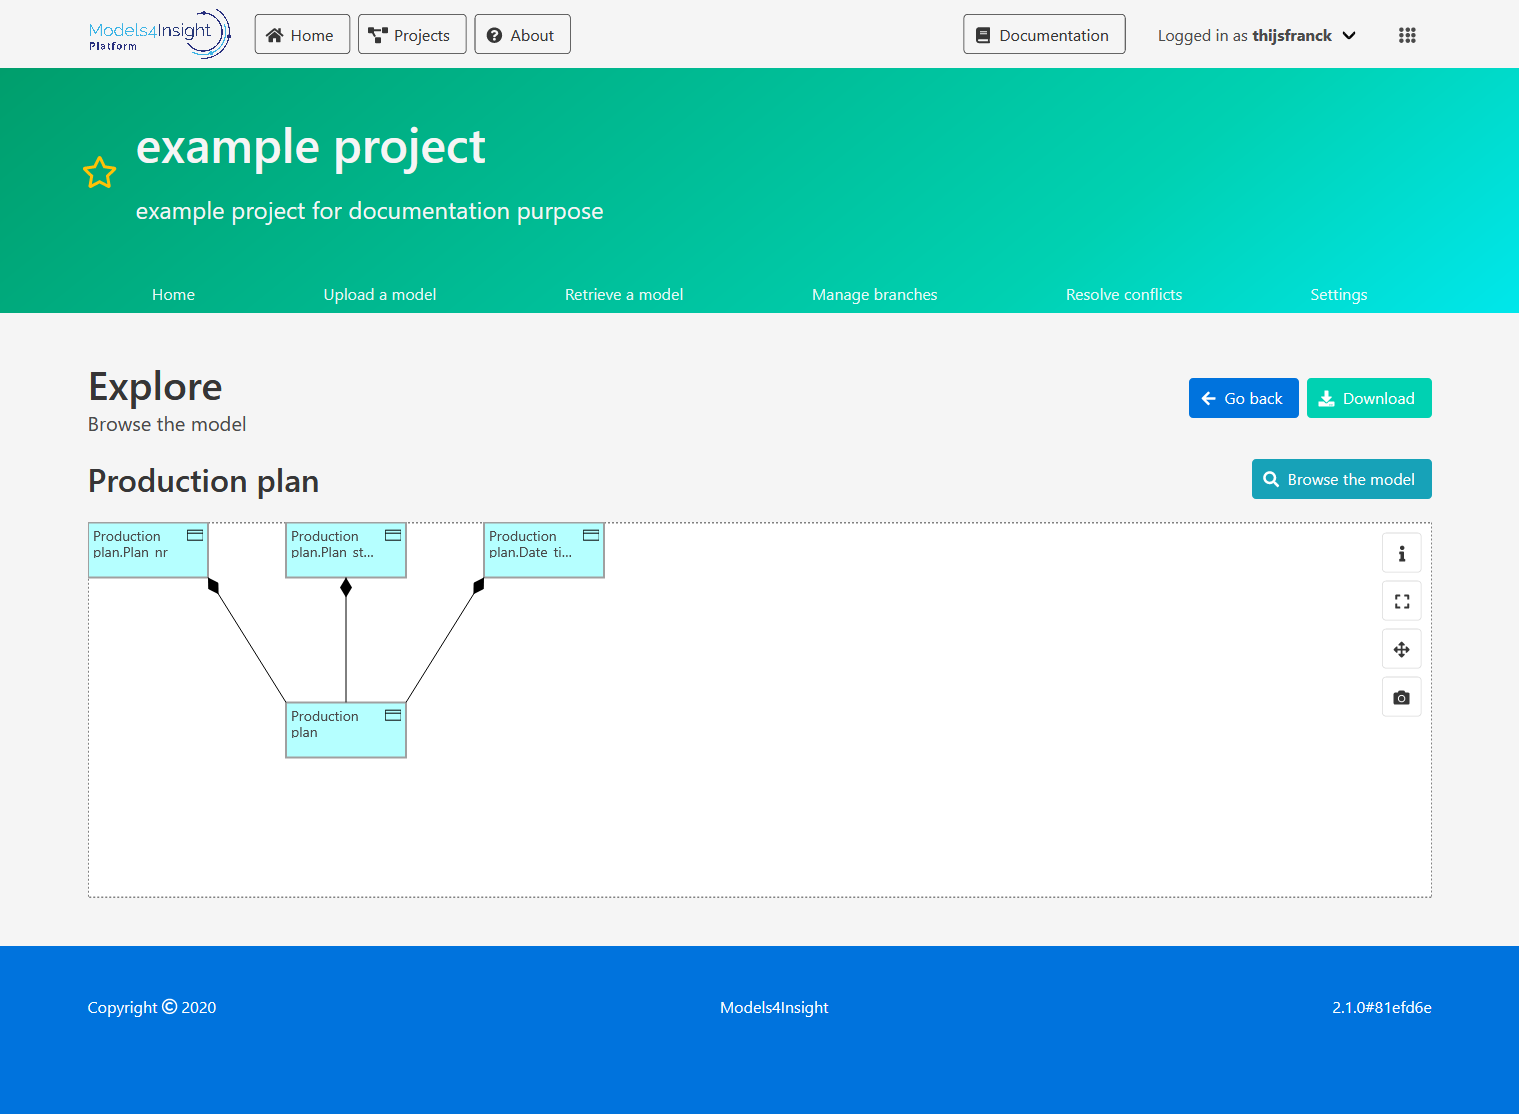
The model explorer shows a single view of the model. You can pan and zoom the view using your mouse and scroll wheel.
Additionally, the model view has several buttons at the top right corner of the view. Use these to access the following functions:
- Show more information about the current view in the side window
- Show the current view in full screen mode (or to exit full screen mode)
- Reset the view to its original position and zoom level
- Download a picture of the current view.
Note that when exporting a picture of the current view from the model explorer, Models4Insight automatically adds metadata that allows you to track the following:
- The project the model is in
- The branch the model is in
- The version of the model
- The id of the view
- The name of the view
- When the picture was exported
- Who exported the picture
This metadata is especially helpful when using the architecture model outside of the repository, such as in documents or presentations. The version info can help identify when such documents need to be updated.
You can click concepts in the view to bring up additional details about the selected concept in the side window. The view info and selection info sections are discussed separately in more detail.
Browse the model
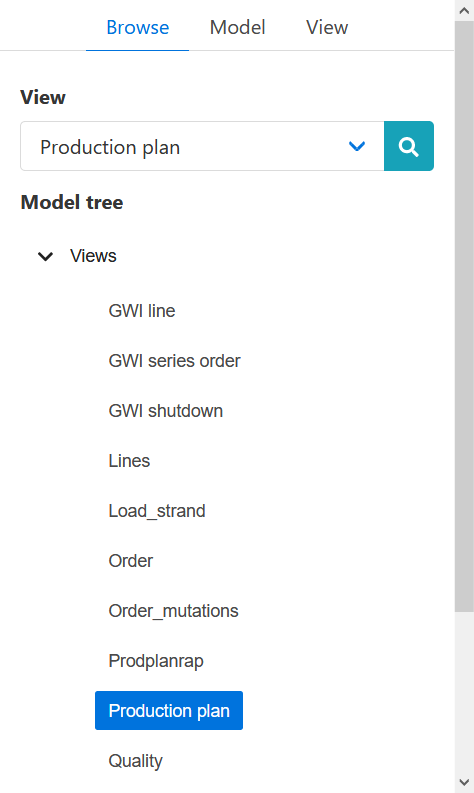
To open another view, start by clicking the Browse the model button to the top right above the view. This will open the side window with the model browser.
The model browser consists of a navigation tree that mirrors the folder structure of the model like in Archi. You also have the option to search for a specific view using the dropdown and search menu above the navigation tree.
When you select another view, it will show up in the model viewer. The model browser will then automatically close. You also have the option to keep the model browser open by pinning it to the side. You can enable this by clicking the pin icon at the top of the side window.
Model details
In addition to the model browser, the side window also contains the following tabs:
- Model: an overview of all elements and relationships in the model
- View info: details about the current view
- Selection info: details about the currently selected concept (if any are currently selected)
Model
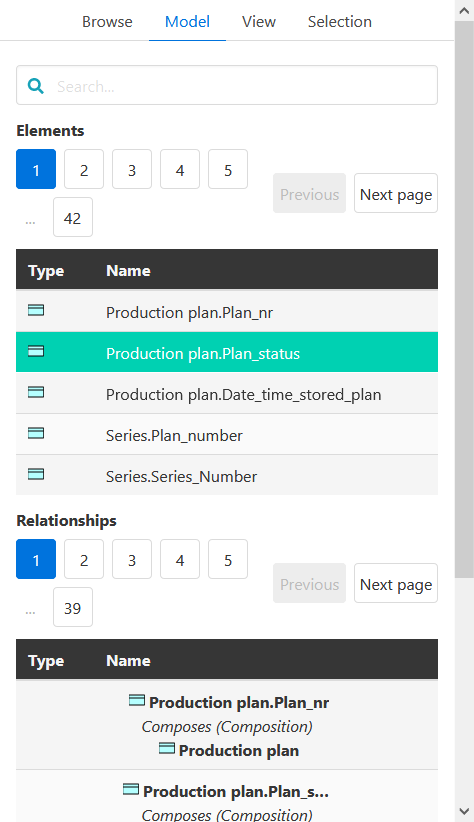
To open the model tab, select the model tab in the side window.
The model tab consists of two tables respectively listing the elements and relationships that make up the model. By clicking on any element or relationship, it will be selected in the model and the selection details will be opened. You can then use the details tab to navigate to any view the concept is used in, or to find connected elements and relationships.
There is also a search bar that allows you to search for any concept in the model via a full text search. Some examples include:
- Searching for a concept by name
- Searching for a concept by type
- Searching for a concept by description
- Searching for a concept by id
Note that you can also use any combination of the above methods. For example, you could use business process finance to find all business processes that include finance in their name or description.
Searching for a concept by id is especially powerful in conjunction with the consistency metrics application.
View info

To open the view info tab, you can use the view info button in the model viewer, or select the view info tab in the side window.
The view info tab shows the name of the current view, as well as the description and any other metadata. If you use view references in your model, there will be a list of view references in the current view, as well as a list of all views referencing it. You can open these views directly by clicking their respective names.
Selection info
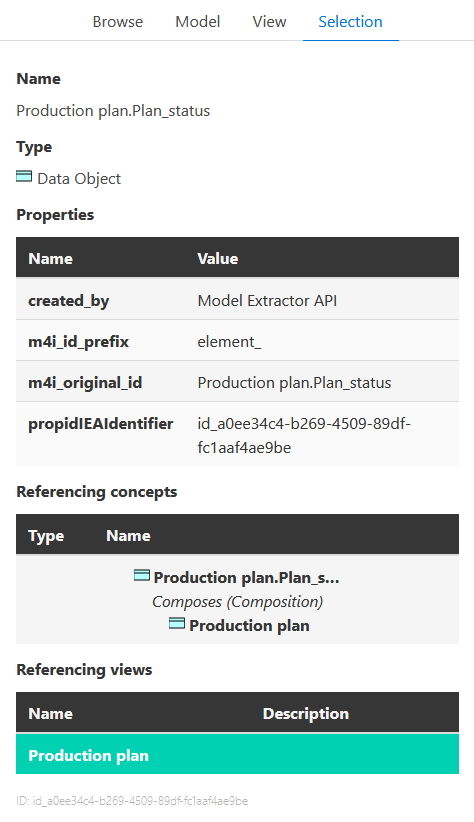
If you have a concept selected in the model, the side window will also have the selection info tab available. When you select a concept in the view, the side window will open to this tab directly. You can also open it by clicking the selection info tab in the side window, if you already have a concept selected.
The selection info shows the name of the currently selected concept, its type, as well as the description and any other metadata. If this concept is used in any views, there will be a list of referencing views shown here. You can open any referencing views directly by clicking their respective names.
If the concept you have currently selected is an element, the selection tab will list all connected relationships. Conversely, if the current selection is a relationship, there will be a table listing the source and target elements. You can select any connected concept by clicking its name in the table.
You can unselect a concept by selecting another concept, or by clicking the selected concept again.
Compare
In addition to viewing a model, the model explorer also has the capability to compare two models with one another. The model comparison allows you to see what has changed between versions of a model. This is useful e.g. when reviewing the changes made by a team member. Alternatively, you can use the comparison to review changes between an as-is and to-be scenario.
You can access the comparison in the same way as the model explorer, via the context menu for a model version or branch. Instead of ‘Explore’, choose ‘Compare’. This opens a window where you can specify the branch and version of the models that should be compared.
After choosing two models to compare, the model explorer will color elements and relationships in the model viewer to indicate differences. The view info section provides a legend for the colors used. Further, the navigation tree includes additional folders that organize the views based on whether or not they have changed.
Move branch

If you want to isolate a version of your model to make adjustments without affecting the original, you have the option of moving that version into another branch. Branching creates a separate version of the model that you can edit in a vacuum.
To create a new branch, click on Manage branches under the project ribbon. This will open the move branch view. Please specify an existing branch in the left drop-down menu.
Next to the right drop-down menu, click the plus button. Fill in the name of this new branch (which must be unique for the project), as well as a description, and click ‘Add’.
Finally, please provide a comment that describes the reason for the move. The comment section cannot be empty.
Alternatively, to move a branch to an existing branch, you can select the branch you want to move to from the right drop-down menu. When moving the branch, you will be prompted to choose which changes to keep. You can read more about how this works in the Conflict Resolution section.
Conflict resolution
Conflicts in your model may arise for a number of reasons. For example, you and a colleague may have made changes simultaneously. Alternatively, you may be attempting to move a model from one branch to another, where another model resides. If this happens, a pop-up appears prompting you to reconcile the conflict(s).
You can resolve the conflicts in your model under the conflict resolution section which is accessible via the project ribbon.
In the conflict resolution screen, you will be initially presented with a list of all uploads/moved branches which have resulted in conflicts. Click any set of conflicts to get started.
Once you have selected a conflict set, you will be presented with an overview of all conflicts found. You can now start resolving the conflicts.
Models4Insight provides several standard conflict resolution templates which help you to resolve your conflicts automatically. You also have the option to reconcile the changes manually.
For each conflict, you have the option to either apply the change from your new version, or to save the current state of the model in the repository. The changes you do not apply are subsequently ignored.
| Template | Description |
|---|---|
| Keep repository | De facto nothing changes |
| Replace repository | Replace the repository head with the new model or source branch |
| Union keep repository | In case of conflicts, keep repository changes |
| Union replace repository | In case of conflicts, replace the repository with the new model or source branch |
| Manual conflict resolution | Manually resolve each conflict |
By clicking any conflict in the overview, you will be presented with additional details about that specific conflict. Here you will also be able to resolve that conflict manually. The left column represents the current state in the repository. The right side represent the state of the new version. By clicking the button in either column you can choose which version to keep.
Once you have resolved all conflicts, or chosen a template, you can apply the conflict resolution to the repository by clicking the ‘Apply’ button at the bottom of the overview.
Project Settings
Available to: Maintainer and higher
Under project settings, you can configure various aspects of the project.
Project description
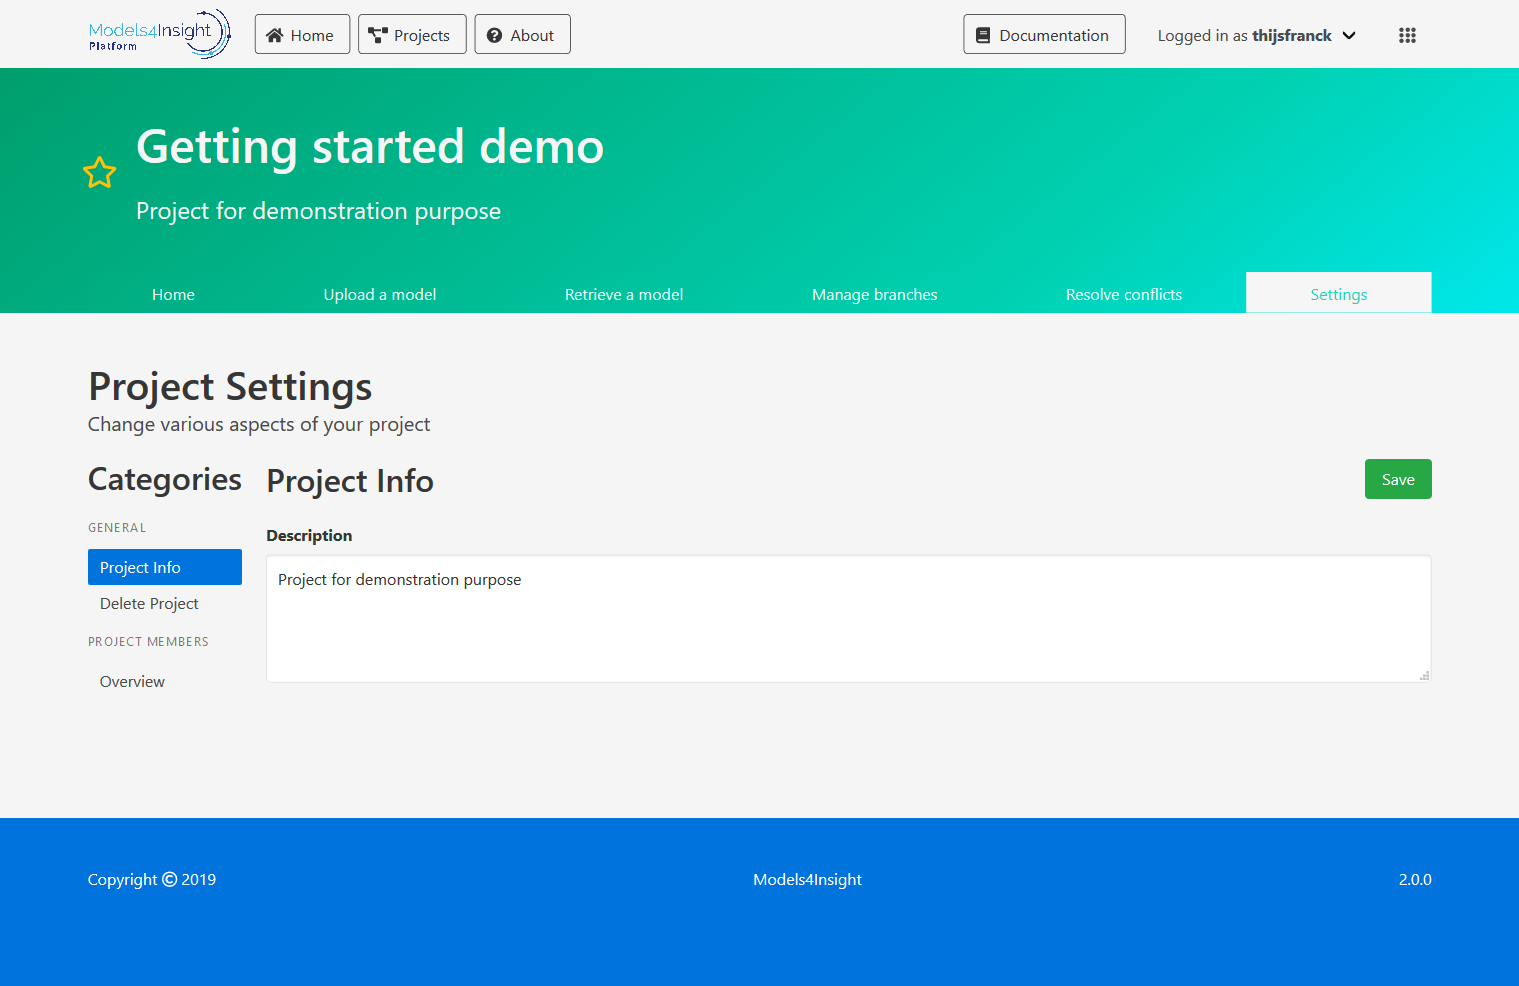
To edit the project description, change the text in the input box and click save. You should see the project description updated in the ribbon.
Delete project

Available to: Project Owner
This section allows you to delete the project and all associated models permanently from the repository. To do so, please hold the red ‘delete project’ button for 3 seconds.
Access management
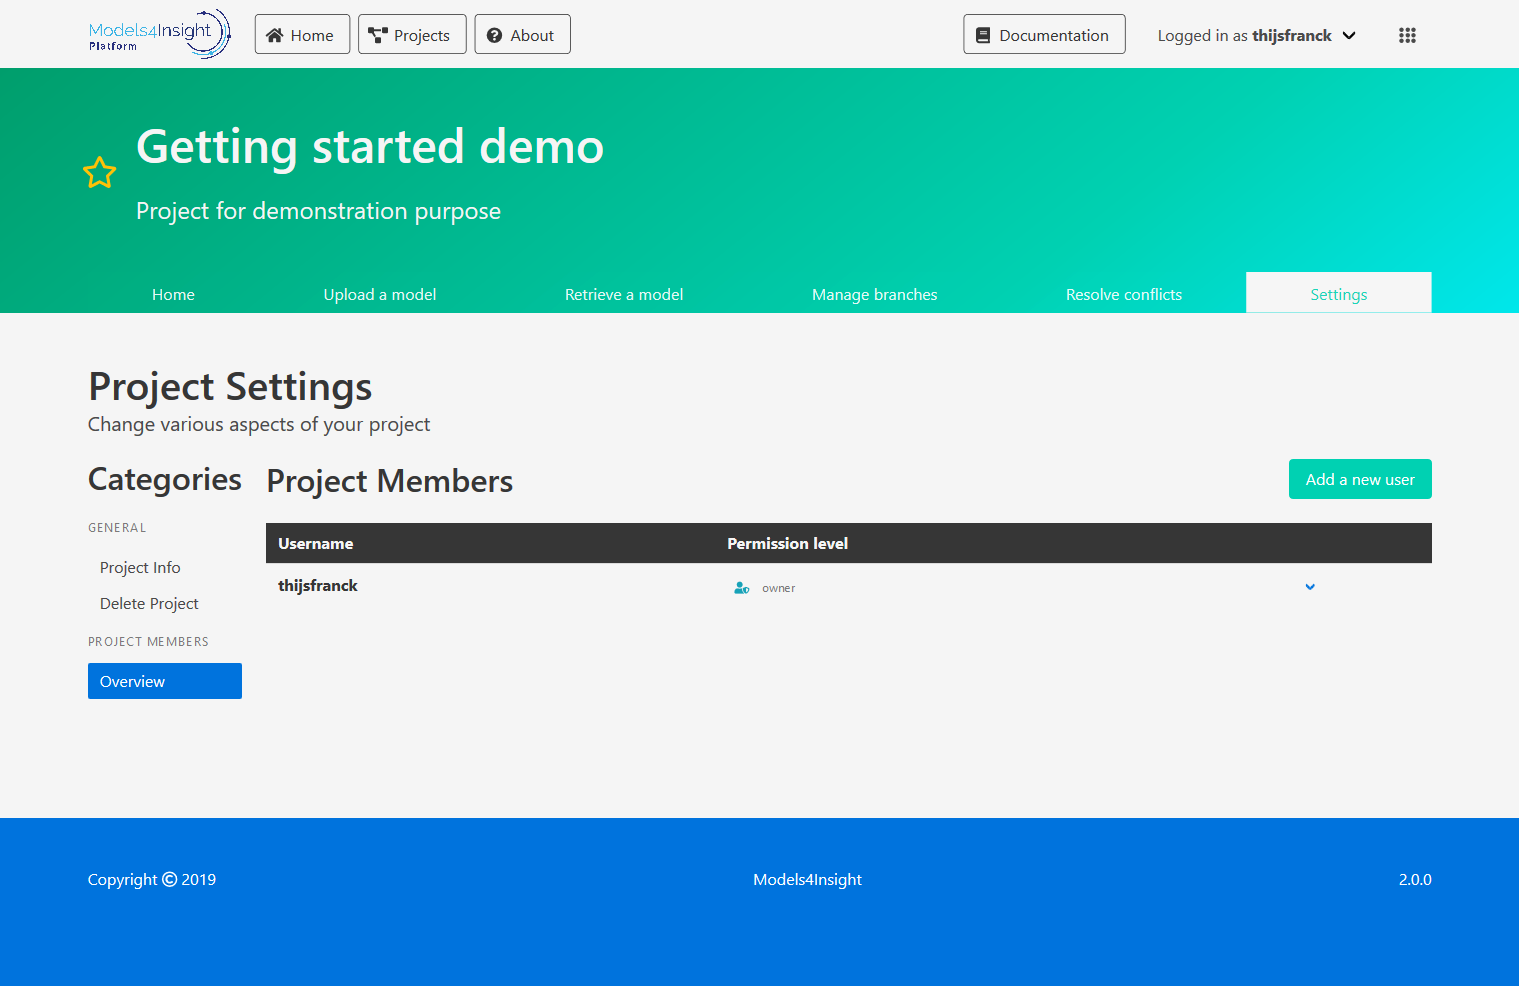
The Members function below settings allows you to grant or revoke other users’ access to your project. The settings page displays a list of all users who currently have access to the project, along with their current permission level. There following permission levels are available:
| Permission Level | Description |
|---|---|
| Owner | Can access all project functions |
| Maintainer | Cannot delete the project, or assign new project owners |
| Contributor | Cannot access the project settings |
| Model User | Can retrieve models, but cannot commit new versions or move branches |
| Business User | Can access the model explorer |
To add a user, click the add user button. Provide the username, email or name of each member you wish to add to the project. This username needs to be valid. You will see a top selection of users matching the search criteria. You can add a user to your project by clicking the ‘Add’ button next to their name. Every new user is assigned the ‘Business User’ role by default. You can change the role of your users via their corresponding drop-down menu.
You can remove existing members of a project by hovering over the dots behind their name, and holding the delete button for a second.
Definitions
Archi
Archi is a free to use, open source editor for ArchiMate models. It can be downloaded on www.archimatetool.com.
Branch
A branch is a separate version of the model that you can edit in a vacuum. The initial model uploaded within the project is saved as the master branch. You have the option of cloning branches and merging them again.
Move branch
Moving a model into a new branch means creating an identical copy of your model that can be edited in isolation. If your project has two or more branches, you have the option to merge two of them into a single branch. Merging combines the versions from each branch into a new version of your model.
Project member
A project member is a user who has access to a project. This includes the creator of the project and any people they have granted project membership to. See section Add member on how to add people to your project.
Retrieve model
You can use the platform to download a version of your model as a file. These files can be used with the Archi editor to make changes to your model. To read more, please see Retrieve model.
Tracking information
Any model retrieved from the platform has tracking information associated with it. The tracking information helps us to keep track of the changes you and your team make to the model. You can view this information in Archi under the properties section. Do not change these properties.
Upload model
You can upload new versions of your model to the repository via the project homepage. To read more, please review Upload model.
Common Issues
If you run into any issues while using Models4Insight, please let us know via info@models4insight.com. We will be happy to assist you.
Models4Insight Platform
If you are having trouble uploading a model, make sure that:
- The comment section is not empty
- Your model is using the .archimate extension
If you are having trouble creating a branch, make sure that:
- The name of the new branch is not empty and unique for the project. The name should also not contain any special characters.
- The comment section is not empty
If you are having trouble moving your model between branches, make sure that:
- The source and target branch are specified
- The comment section is not empty
If you are having trouble adding new people to your project, please make sure their username/e-mail is spelled correctly